Pages

Tuesday 5 July 2011

Ros' Margarita Cupcakes

These are, quite literally, a cocktail in a cupcake. 


With the double whammy of confectionery and booze, it's great for - say - a hen party. More specifically, Ros' hen party. A great friend of mine and a lover of Margaritas.


She was a little overwhelmed by it all.

I created this recipe with Ros in mind. Margaritas are, traditionally, 50% Tequila, 29 % Triple Sec, and 21% Lime Juice. It's quite difficult to make a cake of which 50% is tequila, unless you're going for the trifle effect, so my sincere apologies to any Margarita pedants out there. ;)

So, to begin - with the candied lime slices. 


Take three limes, slice them finely, and blanch them in a pan of simmering water for two minutes - no more, no less. Then heat a fresh cup of water and a cup of sugar, until the sugar has dissolved. Add the limes and keep the syrup at a gentle simmer for 15 minutes. 


Pick out the limes with tongs and lay them on a sheet of greaseproof paper to dry. Do this *at least* half a day in advance.


SAVE THE SYRUP! We'll be using this later.

Prepare a 12-hole cupcake tin with cases. Preheat oven to 180 C / Gas 4. 

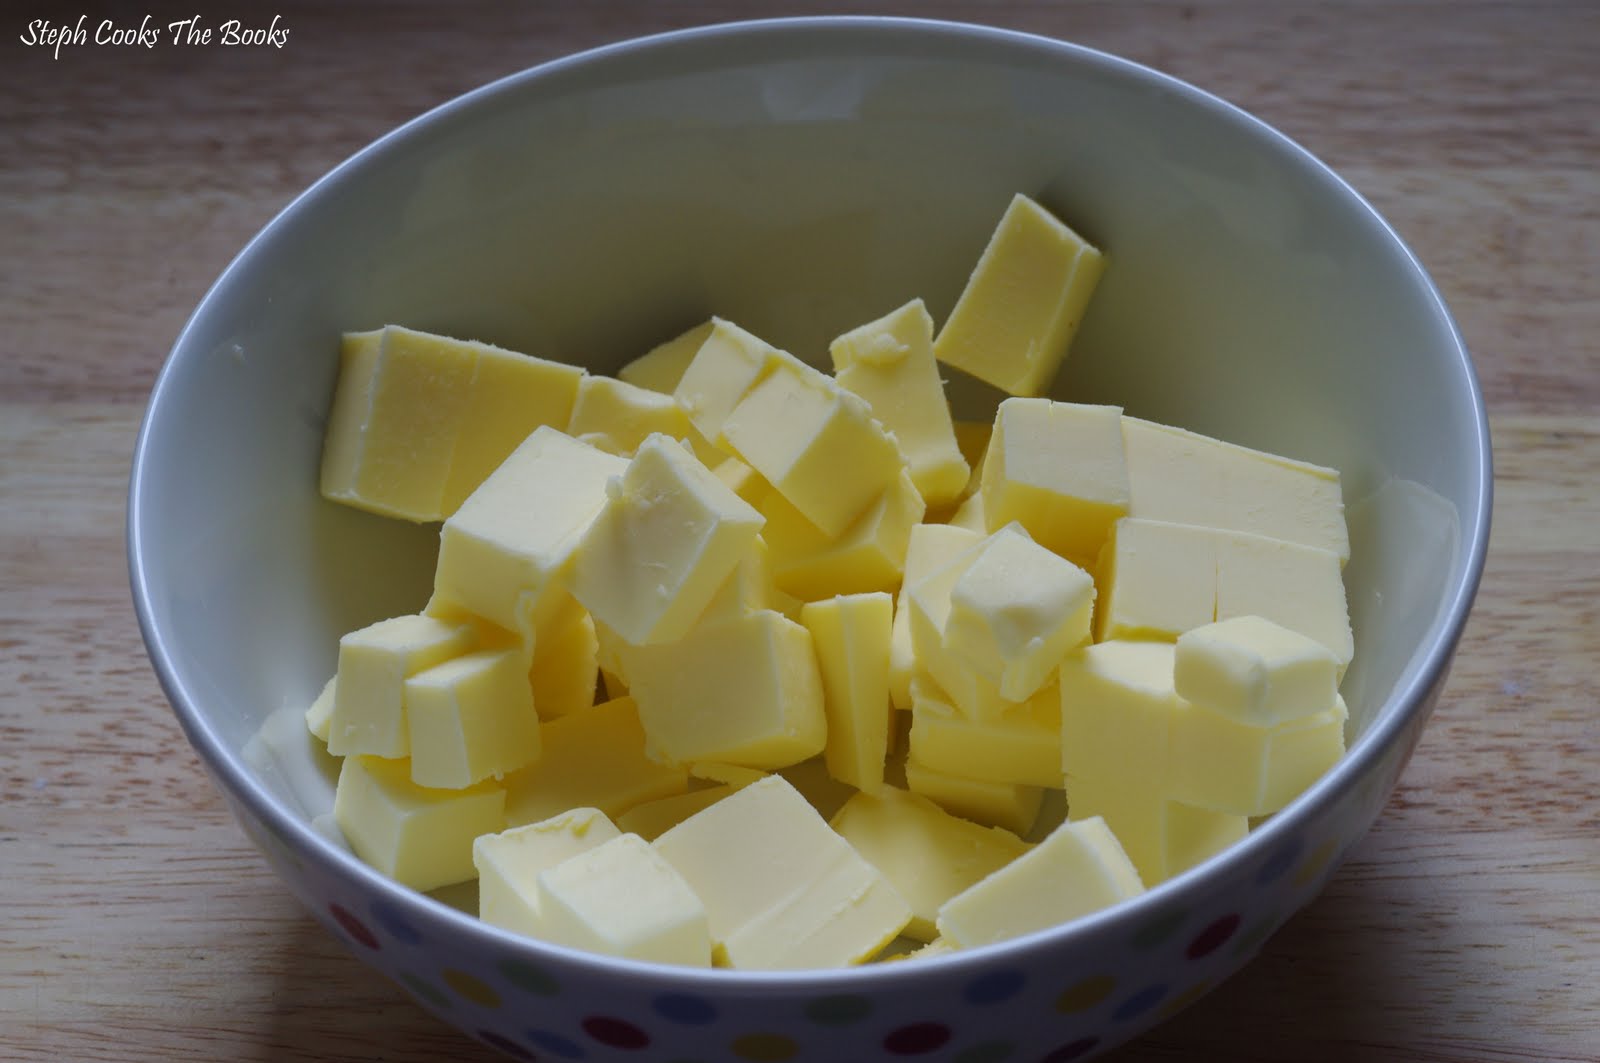
Beat together 115g (4 oz) butter and 115g (4oz) of caster sugar until fluffy. Beat together two eggs, and incorporate, a little at a time. Beat in the zest and juice of one orange. 

Sift in 115g (4 oz) of self raising flour, and 0.5 teaspoon of baking powder. Stir in until *just* evenly mixed. Stop mixing! Spoon the batter into the cake cases, filling about halfway up. Bake for 12 minutes (don't open the oven until 12 minutes has passed!), and then check them every minute, on the minute, until a cocktail stick poked into the centre comes out clean. Tip out of the tin straight away, and leave to cool on a wire rack. 

While the cakes are starting to cool, put the sugar syrup from the candied limes into a small saucepan, and add 7 teaspoons of tequila. (This will make it to the ratio I've found to be just right - if you like your cakes boozier or less boozy, increase or reduce!) Warm it slowly (don't boil it). While it's warming, prick your still-warm cakes several times each with a fork. When the sugar mixture is hot, pour 2 teaspoons over each cake. Leave cakes to cool completely.


Now for the meringue frosting. Have a electric handwhisk on standby. Place four egg whites and 8 oz (240g) caster sugar in a large glass bowl, and place it above a saucepan of barely simmering water. You want the sugar to dissolve in the warm egg white, but the egg MUST NOT COOK. Stir constantly. When the sugar has dissolved, take the bowl off the heat, and whisk on a high setting for about ten minutes, until the mixture is cool and has puffed up beautifully. Whisk in 6 oz (170g) softened butter, the zest of 2 limes, and the juice of one lime. It will look like it's failing. Don't panic. Keep going, until your mixture is smooth. 


Leave to settle for 15 minutes. Spoon over cupcakes.

Dip your candied limes, one by one, into a saucer of granulated sugar. Arrange on top of your cakes.


Happy hen party, darling Rosie. 


(Here's hoping the wedding cake doesn't go tits up. xxxxx)


Tuesday 17 May 2011

Raspberry and Pistachio Divin

divin, adjectif Féminin
Sens 1 Qui appartient à Dieu ou à une divinité.
(Meaning: referring to God or something holy).

Well, they got that right!

This has been my most challenging Ladurée effort to put together so far. With my hands up, I'll admit it – this was my second attempt! The first time, nothing worked. This time, it all fell into place!

I began by making the mousseline cream, a thickened custard which would eventually sandwich this confection together. This needed to chill overnight to become the right consistency to work with – one of the contributory factors to the last disaster!

The recipe called for nougat cream, but you can't find any for love nor money in the supermarkets, and with the cheapest on offer being £5.99 for a jar of 250g, I decided to experiment and find an alternative. What's delicious and goes with raspberries?


No, it's not a bad joke. It's a GREAT joke. It's pistachios!

I whizzed up some pistachios in my blender with a few teaspoons of water, and added them into the custard, then chilled overnight.

The next morning, I made the two almond sponges to form the 'sandwich' of the cake. They're made using ground almonds and a meringue base.

A word to the wise – if you're lucky enough to own a KitchenAid, or any other stand mixer for that matter, be VERY careful making meringues in them – it's so, so easy to overwhip them. I don't do it any more. A hand-held whisk is the way forward here!

Pipe the mixture into two 9-inch discs, and bake.


Cool on wire racks.

Now for the jellied raspberry coulis filling. Soak the gelatin in cold water.


Blend raspberries and sugar and push through a sieve. Use a couple of tablespoons of water to rinse any remaining juice through.


Gently heat about a quarter of the raspberries in a saucepan and dissolve the soaked gelatin. Pour into a dish to cool. The bigger the dish, the quicker it will cool!. Don't cool for more than 30 minutes though!


Now for the assemblage.
Turn one of the discs upside down and pipe the mousseline, again in a spiral formation, over the top, leaving about a 2cm gap around the edge. Smooth with a palette knife. Stud this with raspberries and press them down.


Now pipe another ring of mousseline around the edge of the first layer to form a bowl, and pour in the jellied coulis. Pop this in the freezer for about 20 mins.

Stud the edge with raspberries and place the other disk on top. Et voilà!


What I changed: I used blended pistachios instead of nougat cream. Nom! The texture wasn't completely smooth, but it added a certain bite. The recipe also calls for nougat pieces to be put into the mousseline, but I didn't feel that clicked with the texture of the pistachios.

I completely forgot to take a decent photo of a cross-section of the Divin, so here is a photo, taken mid dessert, on my Blackberry.


Blackberry: great phones – crappy cameras.

Another post soon, I promise – apologies for the delays, but I've got nursing placement at the moment – it's a killer!

Steph xx

**Disclaimer - I'm sorry that I won't be posting the full recipes, but as it's my aim to cook through all the recipes of the book, I don't want to end up getting sued! On the occasions when I'm making my own recipes, or when they're from sources other than the Ladurée book, they will be posted!**


Monday 2 May 2011

Brioche

"Let them eat cake!" - a phrase (dubiously) attributed to Marie Antoinette. And the French do eat it - for breakfast! (Sort of.)

I'll explain. Brioche is a cross between cake and bread. It's made with flour, butter, and eggs - but where cake would have baking powder as its raising agent, brioche uses yeast.

Start by sifting some flour. Ladurée recommend using cake flour, which is bleached and has a lower gluten content than all-purpose flour. (NB: Not self-raising flour - cake flour doesn't contain a raising agent!) You don't see it too much in the UK - it can be replicated by replacing 1 tbsp of each 100g of plain flour with 1 tbsp corn flour. This should give cakes a lighter texture.


Add sugar and salt, and mix in the yeast. (The recipe called for live yeast - I used one packet of dried.)

Cut butter into cubes, and allow to soften.


Beat eggs together, and pour gradually over the flour, working in bit by bit. Once the eggs are incorparated, add the softened butter. The dough should be just about handle-able - the wetter, the better! It will dry out as it leavens - and if your dough is too dry, you will be left with a really dry, crumbly loaf. Your dough will have a rich, yellow colour from the butter and eggs.


Put the dough into a new, greased bowl, and cover with greased cling film. Leave at room temperature until doubled in size (about 2 hours).


Knock the dough back by stretching and folding in half, then leave in the fridge for a further 2 hours. Knock back a final time, and form a log shape. Place in a greased loaf tin. After two hours more, glaze with egg, and bake.
 
This is a long, drawn out process. Time enough to tidy up my mess! ;)


The finished product will have a moist and firm texture, and should slice easily.


At its best - toasted, with Bonne Maman jam!


What I changed: I used dry yeast, instead of fresh. Didn't seem to do it any harm!


**Disclaimer - I'm sorry that I won't be posting the full recipes, but as it's my aim to cook through all the recipes of the book, I don't want to end up getting sued! On the occasions when I'm making my own recipes, or when they're from sources other than the Ladurée book, they will be posted!**

Wednesday 20 April 2011

Tarte(s) Ananas - Pineapple Tarts

There's going to be a fair bit of artistic licence involved in this project, so I may as well tell you now that, in the book, this is instructed to be cooked as one tart. But these tartlets worked just as well - as my tasters will attest.

It started with a pineapple.


The French name, ananas, comes from the Tupi language of Brazil, meaning "excellent fruit". And they were right.


The pineapple starts off as a group of berries, or "ovaries", which then fuse together to make one big fruit.

Begin by slicing the pineapple into sixths lengthways.

I cooked up a caramel...


and mixed in some orange juice, vanilla extract and dark rum.


Pour this over the pineapple, and slow roast in the oven, occasionally basting with the sugary mixture.

Cool completely in the fridge, and then slice finely.


I'd already made some sweet almond pastry - we'll go into that another day...

Normally, you could just line the one pan with the pastry and trim... but I made some Pac-mans...


and placed them into a greased and floured muffin tin, then chilled them in the fridge.

Now for the succulent coconut cream filling.

Soften some butter and beat in sugar, coconut, cornflour, eggs and rum. Whip cream and fold in the coconut mixture.


Remove the shells from the fridge and line the bottom with sliced pineapple. Pipe the coconut cream over the top.


Bake!


Allow to cool completely, then arrange sliced pineapple on top.


What I changed (from the original recipe): the size of the tarts - dessicated coconut instead of coconut flour (which I think made for a great texture) - and I finished the recipe by drizzling the tarts with the juices from the roasted pineapple, giving it extra flavour.


These turned out so well - the pastry was light and crisp, the coconut cream was moist and the texture was soft and chewy, and the roasted pineapple set it off perfectly. A very successful first project!


Please do comment and let me know what you think!

Up next - Crème Brulée!

Steph xx


**Disclaimer - I'm sorry that I won't be posting the full recipes, but as it's my aim to cook through all the recipes of the book, I don't want to end up getting sued! On the occasions when I'm making my own recipes, or when they're from sources other than the Ladurée book, they will be posted!**

Monday 18 April 2011

A new project...


For my birthday last February, I was lucky enough to be given this book by my lovely husband.

There may have been a few hints thrown around. Maybe.

This book is an objet d'art. It has a velvet cover. It has gold-edged pages. It came in a box, wrapped in frickin' tissue paper. Needless to say, this book does not enter the kitchen.

But it does also have 90 excellent recipes. And through the next year, I'm going to be working my way through these recipes, producing tartes, macarons, gateaux and desserts - to name but a few. And after I've finished this project... who knows?

My first post will be celebrating this king of the fruits - the glorious pineapple.


Stay tuned!

Steph xx